Introduction #
In the world of cyber-security, having hands-on experience is invaluable. A home lab setup offers a powerful sandbox to simulate real-world network environments and security incidents. Active Directory (AD) and Splunk are two of the most widely used tools in the industry, forming the backbone of network management and security monitoring in countless organisations.
In this project we will ingest the logs generated from Active Directory in Splunk. We will also simulate an attack on the network and monitor the logs in the next part.
What we’ll be doing:
- AD Administration – Creating users, setting permissions, adding machines to AD.
- Splunk Fundamentals – Creating a local Splunk server, collecting and analysing logs, configuring Splunk.
- Threat Detection and Response – Identifying anomalies, investigating incidents, and applying defensive tactics within a realistic, simulated environment.
Let’s get started!
Structure of the Lab #

The lab will consist of:
- Splunk Server: Ubuntu Server running Splunk Enterprise. Data will be received and stored here from ADDC01 and target-pc.
- ADDC01: Running Windows Server 2022 and this will act as the Domain Controller.
- Target-pc: Running Windows 10/11 with Splunk Universal Forwarder and connected to the Active Directory Domain.
- Kali Linux: We will use this machine to attack Active Directory.
Network Configuration #
The Splunk Server, ADDC01, and Kali Linux will each be assigned static IPs, while the target-pc machine will be configured via DHCP. A NAT connection will be used for this setup, this can be done in VMware Workstation Pro as well as Virtual Box. I will be using VMware Workstation Pro for creating the Virtual Machines.
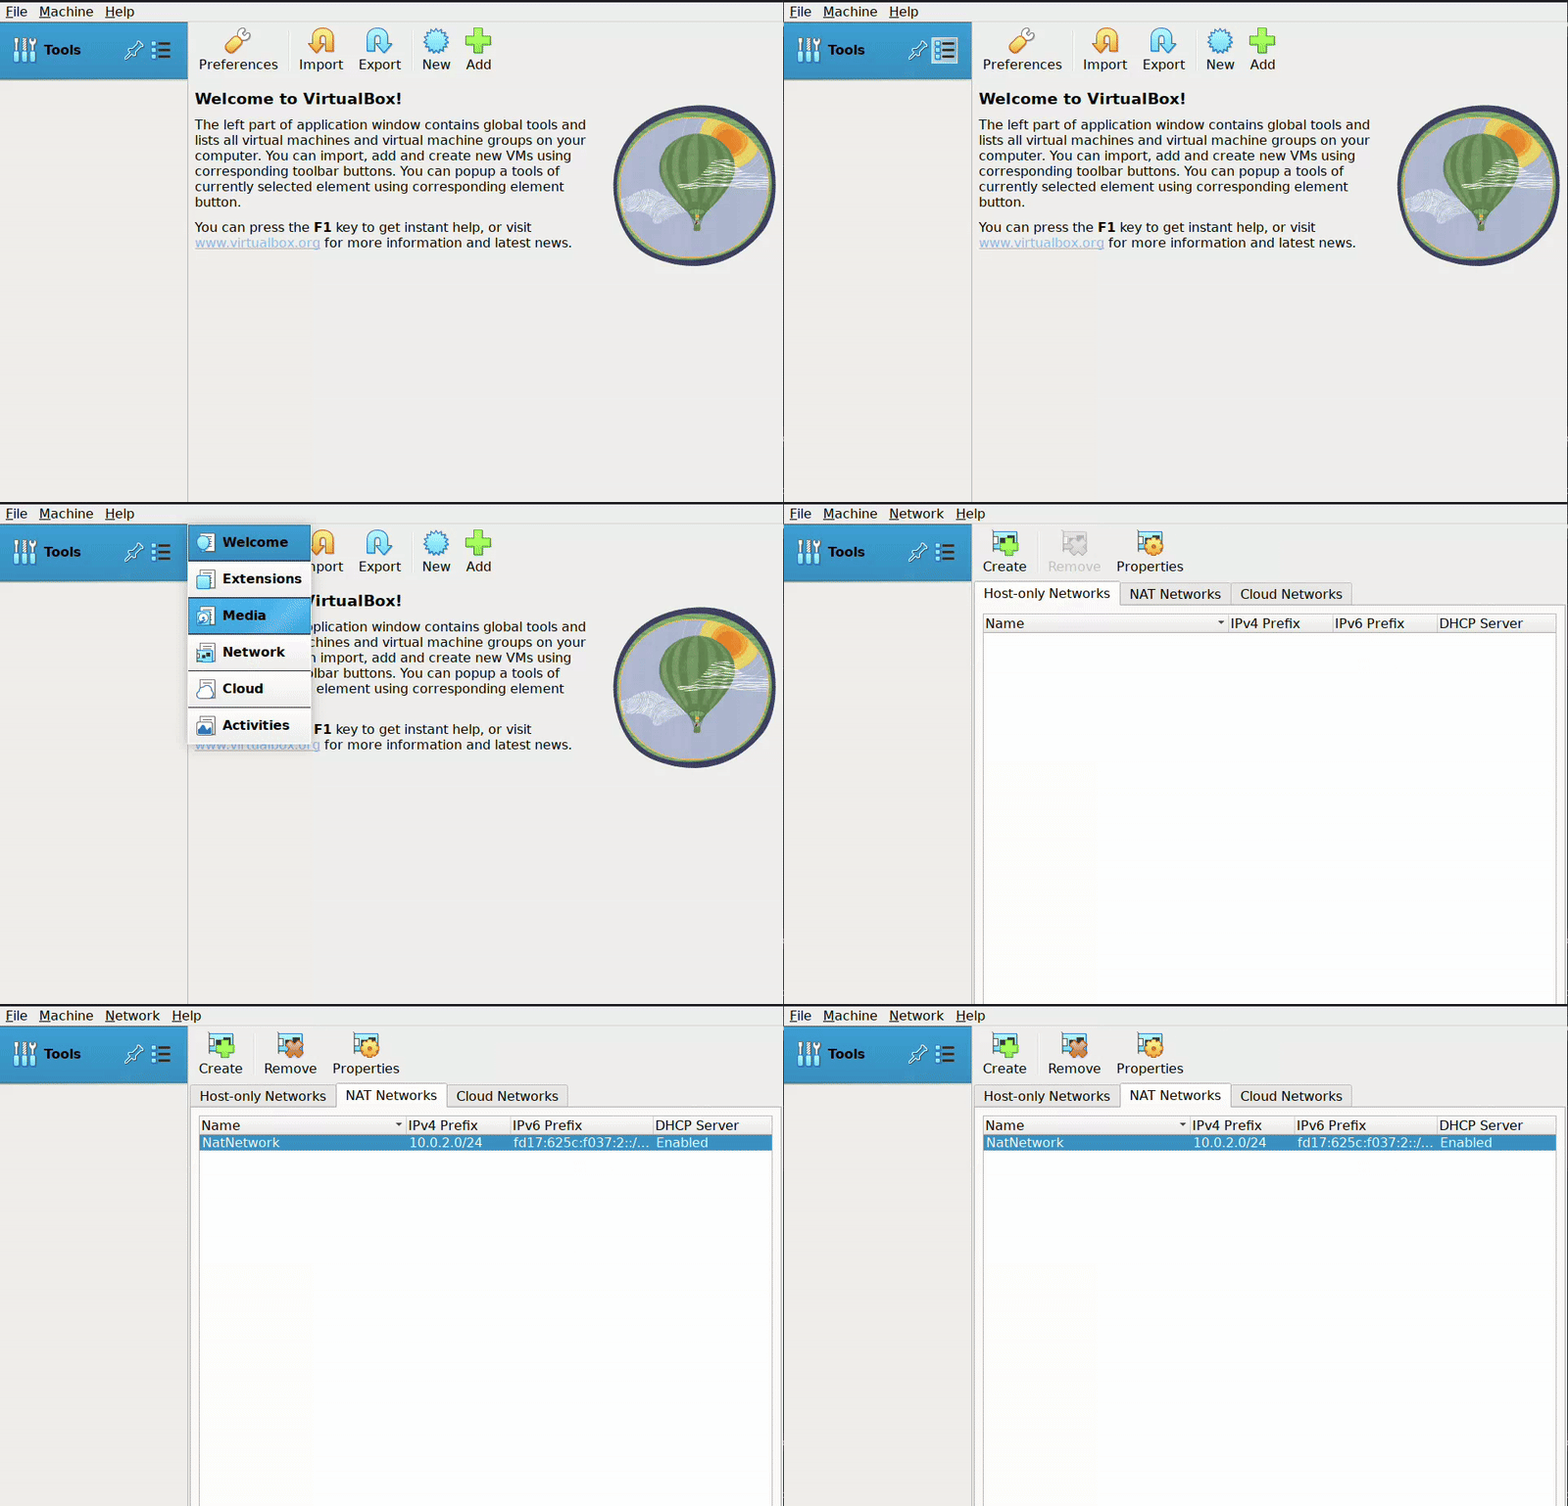
Here’s how to open network settings in VirtualBox:

Edit -> Virtual Network Editor:

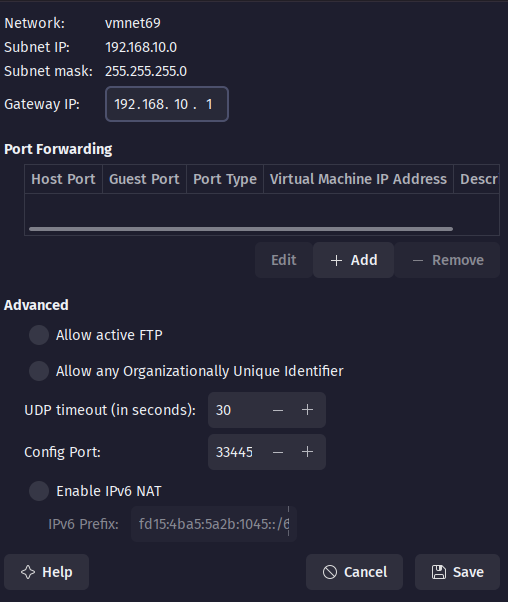
Add network and configure as per the screenshot:


Now set the Network Adapter in VM settings:

For creating the virtual machines download the ISOs from here:
- Ubuntu Server: https://ubuntu.com/download/server
- Windows Server 2022: https://info.microsoft.com/ww-landing-windows-server-2022.html
- Windows 11: https://www.microsoft.com/en-us/software-download/windows11
- Kali Linux: https://www.kali.org/get-kali/#kali-platforms (Download Pre-built Virtual Machine)
Ubuntu Server #
To create a new virtual machine, click File -> New Virtual Machine. Choose Typical setup, select the downloaded ISO image, and specify a folder for the VM. If you have any issues select I will install the operating system later during the install and select the ISO image when running the VM. Repeat these steps for all the VMs.
After you run the VM you will be presented with the following setup screen:

Network Configuration #
After you have set up the Ubuntu Server instance we need to configure the network settings.
To do this first delete all the files in the /etc/netplan directory:
sudo rm /etc/netplan/*
Now create and open the following file:
sudo nano /etc/netplan/00-installer-config.yaml
Now type in the following:
network:
	version: 2
	renderer: networkd
	ethernets:
		ens33:
			dhcp4: no
			addresses:
				- 192.168.10.10/24
			routes:
				- to: default
				  via: 192.168.10.1
			nameservers:
				addresses: [8.8.8.8]

Now to apply the configuration:
sudo netplan apply
Check if the IP address is 192.168.10.10:
ip a

Configuring Splunk #
Go to http://splunk.com and sign up for a free account.
Then go to Products-> Free Trials & Downloads

Get Splunk Enterprise:


To access this file from our Ubuntu Server VM we need to setup shared folders.
Open VM settings by either right clicking the VM tab or in the sidebar:


We can access the folder at /mnt/hgfs/{Shared-Folder-Name}.
To view the folder:
ls /mnt/hgfs

To install the .deb package:
sudo dpkg -i /mnt/hgfs/HostDocs/splunk-*.deb

/opt/splunk.
cd /opt/splunk

ls -la we can see the files are owned by splunk user
We’ll open bash as splunk user:
sudo -u splunk bash
Now go to /opt/splunk/bin and install splunk:
cd /opt/splunk/bin
./splunk start

Click space continuously and agree license.

Now exit splunk bash and enable splunk on boot
exit
Go to /opt/splunk/bin and enable splunk on boot:
cd /opt/splunk/bin
sudo ./splunk enable boot-start -user splunk

Windows 11 #
Setup the Windows 11 VM in VMware
Refer here!
Renaming #
Let’s first rename this machine. Right-click on This PC icon on desktop

Click on Rename this PC:


Network Configuration #
Open command prompt and type ipconfig to check the IP address.

Open Settings and go to Network & Internet


Configure as shown:

ipconfig:

Now visit http://192.168.10.10:8000, we can see the Splunk enterprise page:

Splunk Installation #
Visit splunk on the Windows 11 VM and login.


Sysmon #
Sysmon (System Monitor) is a Windows system service and driver part of Microsoft’s Sysinternals suite. It logs detailed events about system activity, such as process creation, network connections, file changes, and registry modifications. We will use Splunk to collect the logs from Sysmon.
Let’s download and setup Sysmon.

Now download the config for Sysmon from here. This config provides a modular and highly customizable Sysmon configuration file.
It’s designed to make Sysmon (System Monitor) setup more manageable and adaptable to specific environments, particularly for security monitoring and threat hunting. This will make our lives much easier.
Download sysmonconfig.xml from the repository:


Extract Sysmon.zip by right-clicking, and click on extract all.

Go to the Sysmon folder and copy the file path:

Open Powershell as administrator and go to the file path where Sysmon is located:
cd C:\Splunk\Sysmon
Now use the config file with Sysmon. Mine is in the parent folder which in this case is C:\Splunk
.\Sysmon64.exe -i ..\sysmonconfig.xml


Splunk Configuration #
Before we start note that the deefault inputs.conf is in C:\Program Files\SplunkUniversalForwarder\etc\system\default if you mess anything up.
Now in C:\Program Files\SplunkUniversalForwarder\etc\system\local create inputs.conf file.
Run Notepad as administrator and paste this in notepad:
[WinEventLog://Application]
index = endpoint
disabled = false

[WinEventLog://Security]
index = endpoint
disabled = false

[WinEventLog://System]
index = endpoint
disabled = false

[WinEventLog://Microsoft-Windows-Sysmon/Operational]
index = endpoint
disabled = false
renderXml = true
source = XmlWinEventLog:Microsoft-Windows-Sysmon/Operational
We are using index as endpoint so our Splunk server needs to have an index called endpoint which we will soon create.
Now File-> Save As:
Go to this location:C:\Program Files\SplunkUniversalForwarder\etc\system\local.
Select All files for type and name as inputs.conf

Anytime you modify inputs.conf you need to restart the Splunk universalforwarder service.
To do that search services in start:


Now we need to change Splunk Universal Forwarder to logon using the Local System Account so that it has sufficient privileges to access the files it needs to create logs.
Go to Log on tab and change it to Local System Account:

Now in the services list right-click on SplunkForwarder and Restart.


Now open a browser tab and open http://192.168.10.10:8000/


Create a new index:

Just input name as endpoint(as per the index in inputs.conf) and leave everything as is.

Now go to Settings->Add Data->Forwarding and Receiving:


Now head to Apps-> Search & Reporting:

Search for:
index="endpoint"


In Source we can see the stanzas we mentioned in inputs.conf file:

Windows Server #
By now I hope you are familiar with the process of installing a VM so you can go ahead and install it.
Refer here!
Renaming #
Let’s rename the machine similar to how we did for the Windows 11 machine. Head to Settings-> About and click on rename.

Splunk & Network Configuration #
Do the same steps that were done for the Windows 11 VM to setup the network and Splunk universal forwarder.
Click to go thereHere’s a quick summary:
- Network Configuration

- Install Splunk Universal Forwarder.
- Install Sysmon with the olaf’s config
- Create inputs.conf file
- Restart the service after setting logon account.
After you’ve set it up go to the Splunk console at http://192.168.10.10:8000/ and Apps-> Search & Reporting:

Active Directory #
In this section we’ll go through the process of setting up Active Directory (AD) to effectively manage user access and resources. We’ll begin by creating Organizational Units (OUs) to organize our users and resources, followed by adding user accounts within those OUs. In the spirit of keeping it short, this will be a toy model compared to what a real organisation’s Active Directory would look like.
Open server manager:


Now click on the flag icon:


A Domain Controller (DC) is a server that manages access to a networked environment using Active Directory (AD). It authenticates and authorizes users and computers within a Windows domain, enforcing security policies and providing directory services. The DC stores information about the domain, including user accounts, group policies, and resources, ensuring that users can access network services securely and efficiently. If a Domain Controller is compromised then it’s game over as all credentials are stored in it.
Set a domain name, I will choose splunky.local :

Set a password you can remember and leave the rest as default.

Then click on next until install is available:

Adding Users in AD #
Go to Tools-> Active Directory Users and Computers

We will create Organizational Unit (OU), an Organizational Unit (OU) in Active Directory (AD) is a container used to organize users, groups, computers, and other OUs within a domain. OUs help structure the directory hierarchy for easier management and delegation of administrative tasks. They allow for the application of group policies and can be used to reflect the organization’s functional or geographic structure, enhancing security and organizational efficiency. For example we can have Organizational Units for Job roles like HR,IT, Marketing, Sales, Developers, etc.
For example Jack from HR should not have the ability to install software, disable firewall or change system settings.
Now Right-click on the domain(in this case splunky.local) and click on Organizational Unit to create one:


Now create a user:


Let’s create one more Organisational Unit and create a user similar to how we did in the previous steps:

Add Target-pc to the Domain #
Now open the Target-pc VM.
Search for View Advanced system settings in start and open it:


Set the domain to what you have created in the server:


We need to set the DNS server as the DC to resolve the domain.
To do this, open network settings:


ipconfig /all


Try logging in with a user you created:

Congratulations! You have successfully set up Splunk and Active Directory AND they work together!

Attacking with Kali Linux #
The Kali VM will be preconfigured so you can directly open the VM. But…….

Refer here!
We will stop here and continue in Part 2 of this blog, where we will focus on attacking the target-pc. We’ll monitor the logs in Splunk to analyze how our attacks are recorded and what insights they provide. Stay Tuned for Part 2!

